In my previous blog, I showed you how to install a KVM virtual machine on Fedora 41. That method works great when you have physical access to the host machine. But what if you're stuck without physical access and still need to install a VM urgently?
Don't worry — in this guide, I’ll walk you through how to install an Ubuntu Server VM remotely.
Step 1: Set Up Remote Access
First, ensure you can access the host machine remotely, typically via SSH.
Also, make sure KVM and QEMU are installed on both the host and local machines. If you haven't installed them yet, you can do so easily with:
sudo dnf install @virtualizationStep 2: Download the Installation Image
Download the latest Ubuntu Server ISO from Ubuntu's official website.
For this example, we'll use the Ubuntu 24.04.2 LTS live server image
Step 3: Create the Virtual Machine
virt-install \
  --name ubuntu-24.04.2-lts-server-exp \
  --memory 8192 \
  --vcpus 8 \
  --disk size=60 \
  --cdrom ubuntu-24.04.2-live-server-amd64.iso \
  --os-variant ubuntunoble \
  --graphics vnc \
  --noautoconsole
Key Options Explained:
--graphics vnc: Tellsvirt-installto expose a VNC server for installation.--noautoconsole: Prevents the console from automatically attaching, since we'll manually connect via VNC.
Why VNC?
Some may suggest using ssh -X for X11 forwarding, but X11 forwarding is notoriously slow and unreliable for installations.
VNC provides a much smoother experience with better responsiveness.
After running the command, you should see an output similar to:
Starting install...
Allocating 'ubuntu-24.04.2-lts-server-exp.qcow2'                                                                                       |  60 GB  00:00:00
Creating domain...                                                                                                                     |         00:00:00

Domain is still running. Installation may be in progress.
You can reconnect to the console to complete the installation process.
Since we used --noautoconsole, no installation window will pop up automatically — this is expected.
Step 4: Connect to the Remote Installation Window
Exit your SSH session:
exitThen, on your local machine, connect to the remote VM using virt-viewer:
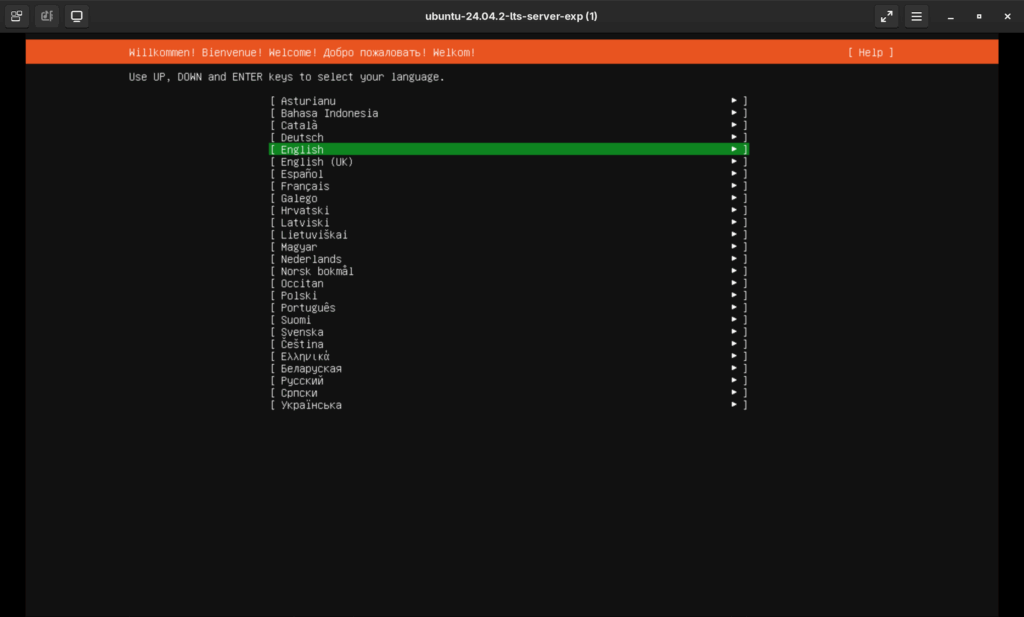
virt-viewer --connect qemu+ssh://<remote-username>@<remote-ip>/session ubuntu-24.04.2-lts-server-expThis will open a window where you can continue the Ubuntu installation just like you would locally. Remember to replace <remote-username> and <remote-ip> with yours.
Step 5: Unmount the Installation Media
At the end of the installation, Ubuntu will ask you to eject the installation media.
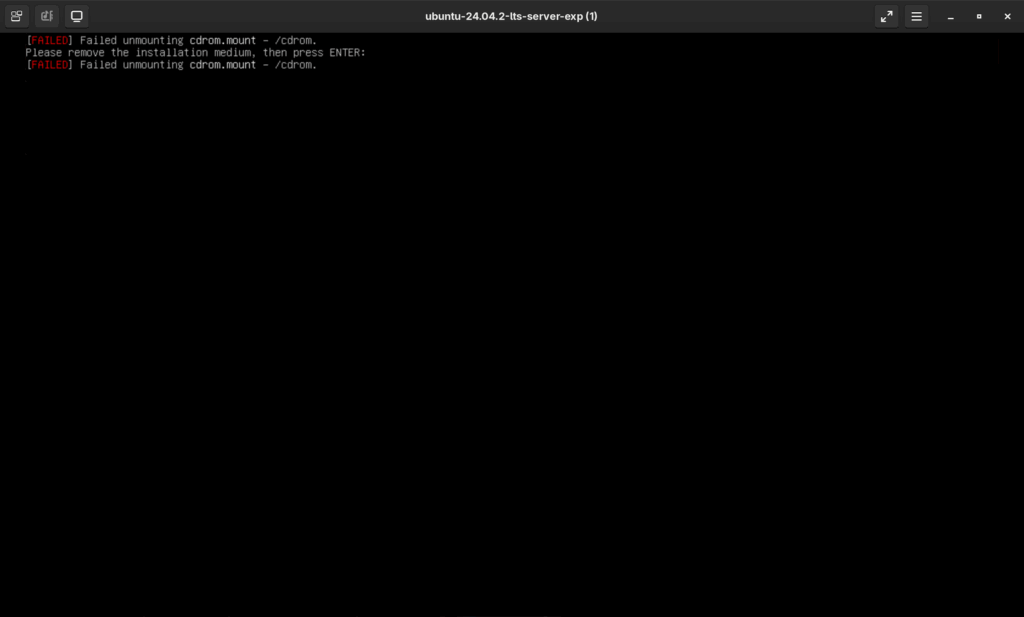
To do this, first connect to the remote host OS via SSH, and then:
1. List the disks attached to the VM:
virsh domblklist ubuntu-24.04.2-lts-server-expSample output:
Target   Source
-----------------------------------------------------------------------------
vda      /home/melody/.local/share/libvirt/images/ubuntu-24.04.2-lts-server-exp.qcow2
sda      /home/melody/linux-images/ubuntu-24.04.2-live-server-amd64.iso
2. Detach the installation ISO:
virsh detach-disk ubuntu-24.04.2-lts-server-exp sda --configYou should see:
Disk detached successfullyConclusion
That's it! You now know how to install an Ubuntu Server VM remotely using KVM, VNC, and virt-install.
This method ensures you can spin up VMs even when you can't physically reach the host.
If you found this helpful, stay tuned for more virtualization tips!
Comments NOTHING